环境
ESP32提供了标准的工具链,在Linux下配置容易,但是使用Clion的IDE需要进行相当的配置,踩了一些坑记录一下。
Windows 10
WSL
Clion 2020.2.4
ESP-IDF 4.2
WSL安装
WSL安装可参考
https://docs.microsoft.com/en-us/windows/wsl/install-win10如果使用WSL2的话,要使用脚本为wsl设置host名,在每次启动wsl时写入windows的host文件。
不折腾的话可以使用WSL1版本。
WSL内安装最新版本Ubuntu。
ESP工具链
参考
https://docs.espressif.com/projects/esp-idf/zh_CN/latest/esp32/get-started/linux-setup.html配置工具链。
一定使用文档上提供的安装路径(也就是$HOME$/esp/esp-idf),避免麻烦。
如果网络git很慢,可以使用proxychains4进行代理。
步骤简述如下:
sudo apt-get install git wget flex bison gperf python python-pip python-setuptools cmake ninja-build ccache libffi-dev libssl-dev dfu-util
sudo apt-get install python3 python3-pip python3-setuptools
mkdir -p ~/esp
cd ~/esp
git clone --recursive https://github.com/espressif/esp-idf.git
cd ~/esp/esp-idf
./install.sh
然后在.zshrc或者.profile或者.bash_profile(视你使用的bash而定)
加入
alias get_idf='. $HOME/esp/esp-idf/export.sh ; source ~/.espressif/python_env/idf4.2_py2.7_env/bin/activate'
alias get-idf=get_idf
注意python_env这个路径要自己看一下修改成你当前的路径。
然后进入wsl后,运行
get-idf就可以启动python虚拟环境,设置esp-idf工具链环境变量了。
CLION安装
具体在Jetbrains官网安装Clion最新版
开发目录
从hello_world创建开发工程
get-idf
cd ~/
mkdir project
cd project
cp -r $IDF_PATH/examples/get-started/hello_world .
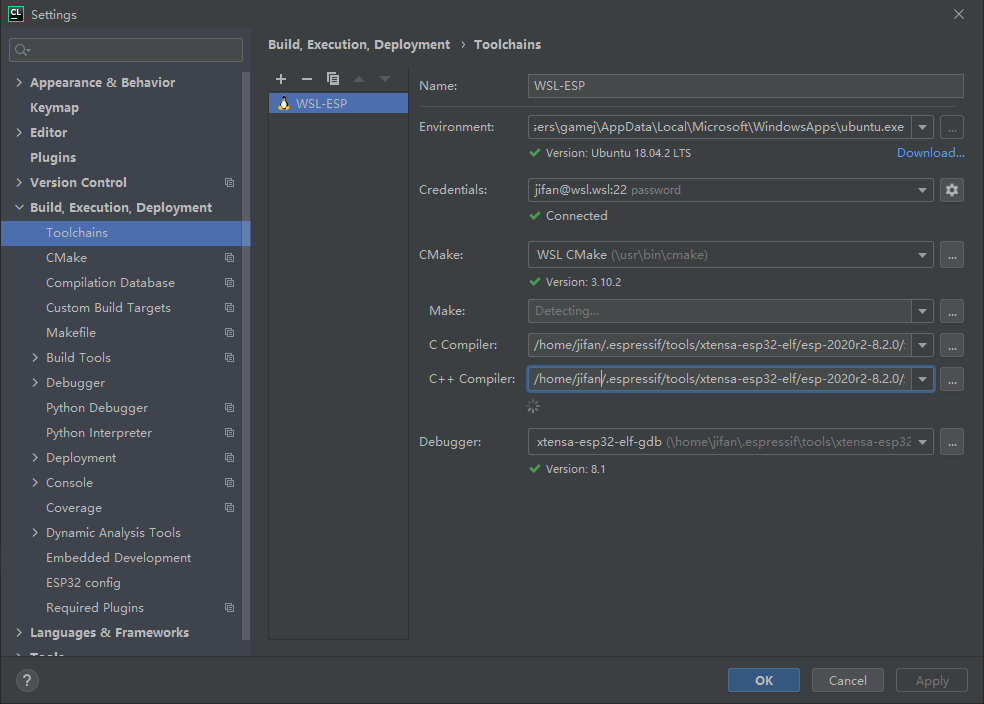
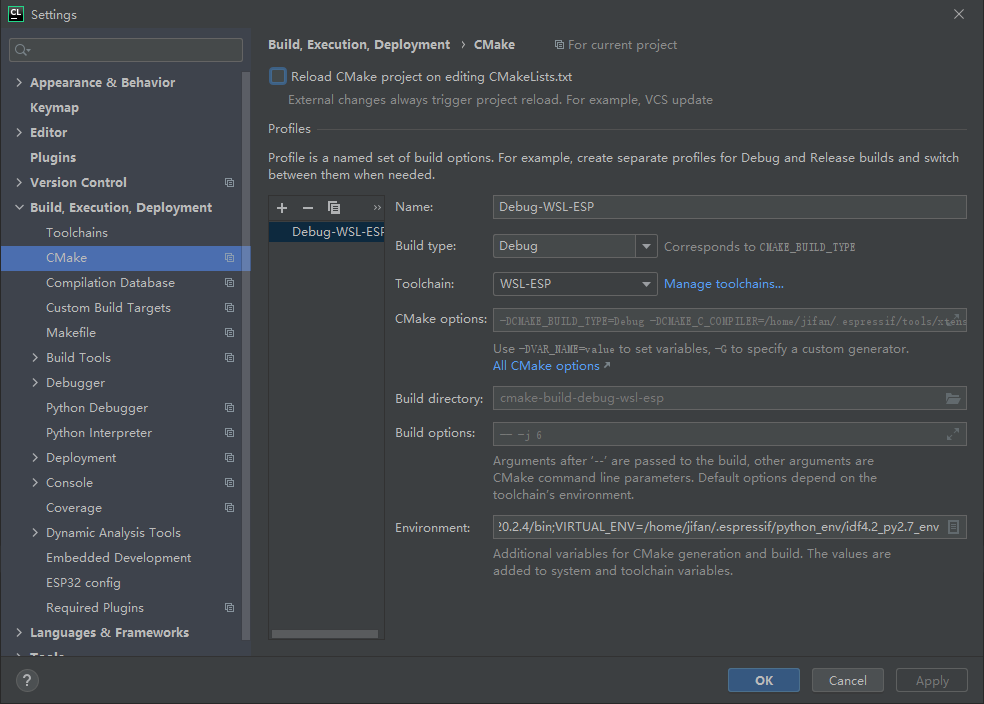
CLION配置


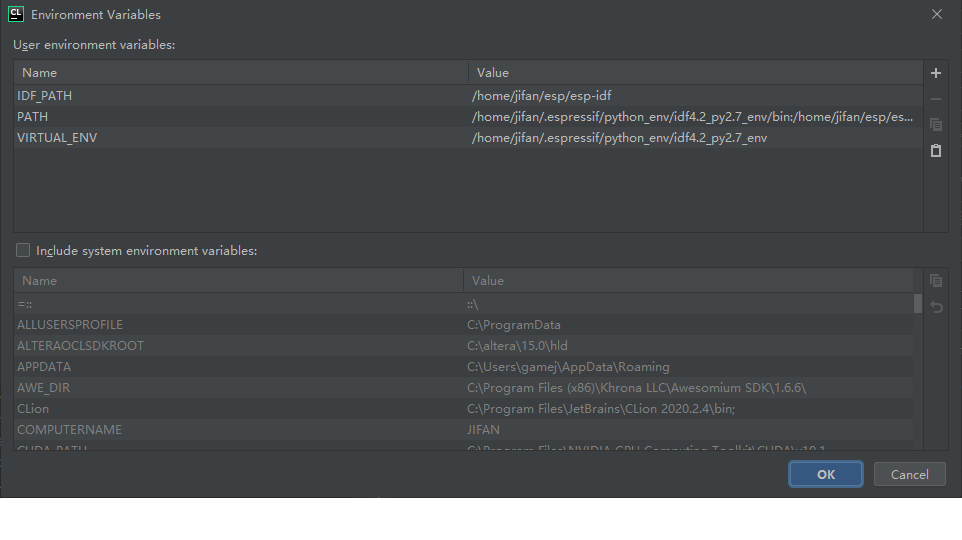
注意在cmake配置中,环境变量右侧菜单打开后,要取消勾选Include system environment variables,然后在wsl内,get-idf,把IDF_PATH, PATH, VIRTUAL_ENV环境变量复制在User environment variables内。
使用
然后就可以右击CMakeLists.txt Reload,成功后在Build内编译了。


